Creating a website that is both functional and aesthetic is not an easy task. In this article, we will guide you through the process of preparing a site outline step by step.
Last time [here], we showed you how we work with our custom-built WordPress themes in order to have an efficient work setup and good foundation for later optimizations. This time around we are going to show you our WordPress hosting setup that not only maximized our blog’s PageSpeed score from 70 to 97, but also our YSlow score from 60 to 91. Check out the GTMetrix result here:
https://gtmetrix.com/reports/www.nopio.com/9E5gNhZE
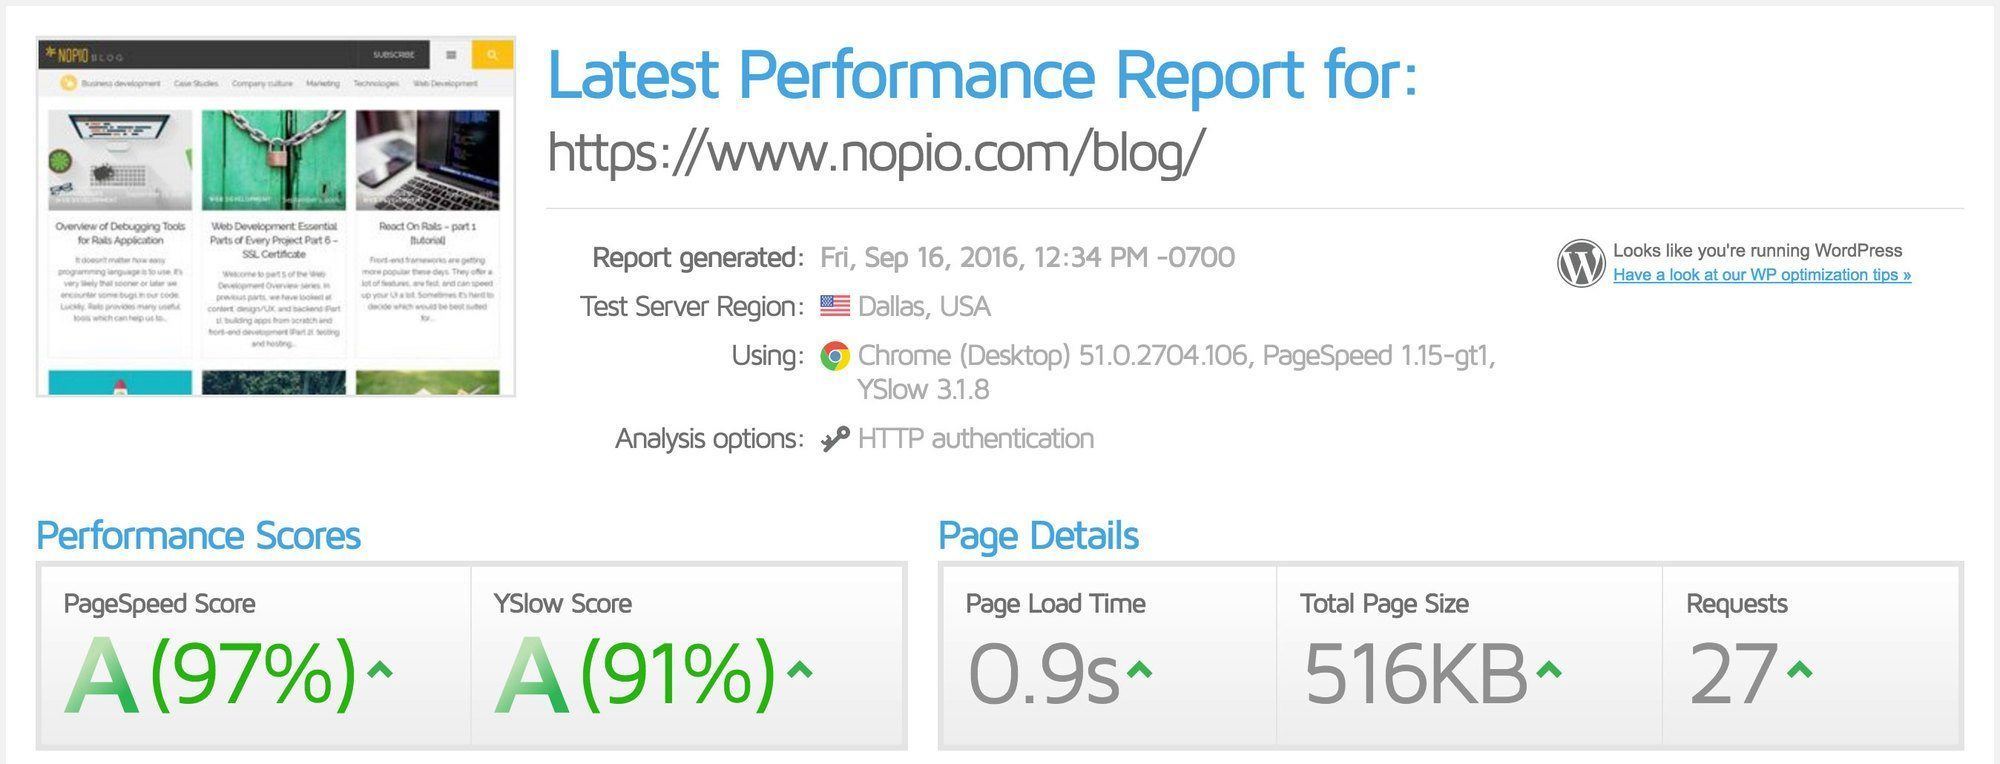
Overview of optimized WordPress hosting
We’re running the www.nopio.com/blog site on a $10 DigitalOcean droplet and, with the exception of comments (handled by Disqus), we don’t have any dynamic content, meaning we can use as much cache as we like without any major headaches.
Basically, we know that the only moment the cache needs a refresh is when we publish new content. In any other circumstance, there are four separate mechanisms to handle user requests before they reach the WordPress app:
1. User browser cache
We’re setting lengthy expire headers on the served content and use cache-buster parameters in the URLs (eg. ?v=41) to force refresh if any change has happened.
2. Content Delivery Network (CDN)
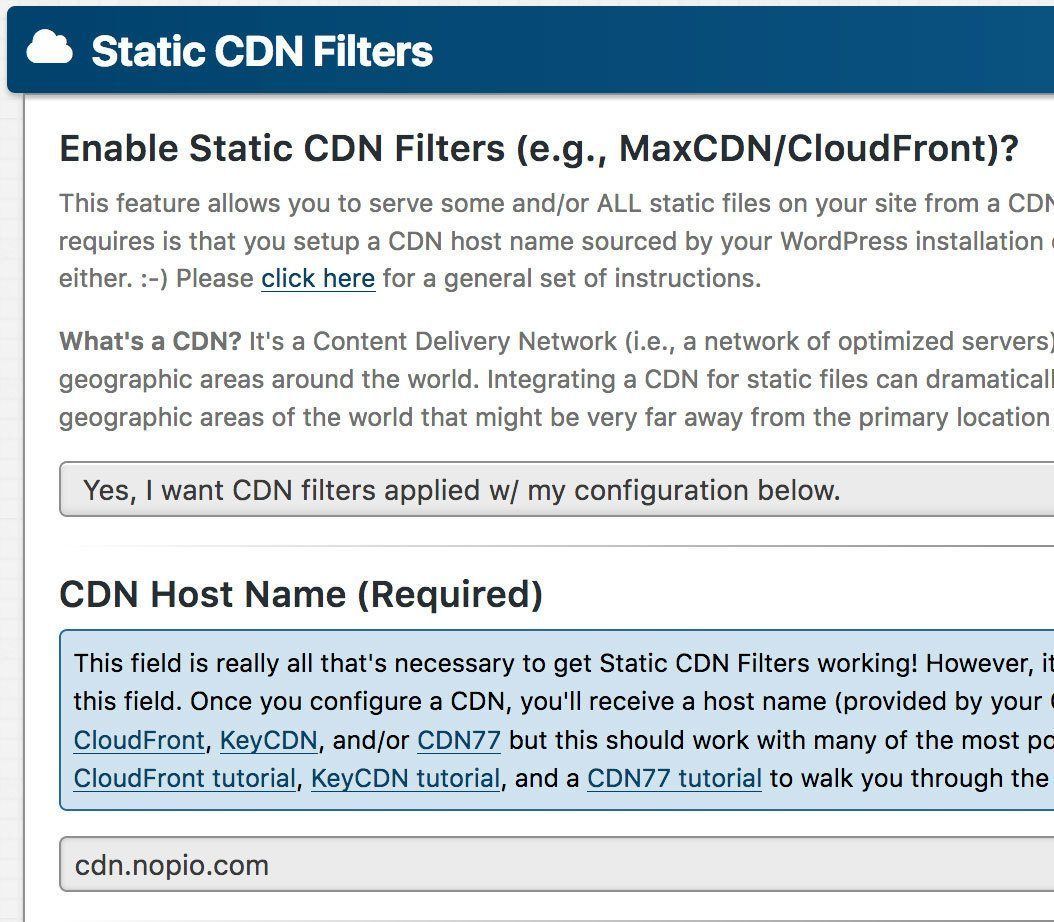
Using CometCache plugin, we re-point URLs to the static assets (images, css and js files) to be served from a separate domain (cdn.nopio.com) that is in fact an Amazon CloudFront distribution.
3. CloudFlare
All requests except static assets go through a CloudFlare proxy. This ensures DDoS protection, handles occasional server outage with its AlwaysOnline feature, and caches the HTTP of web pages on a cloud of edge servers. Now the user request for the web page HTML is served from a proxy server close to the requester. It’s insanely fast – you’ll experience cached page request times at a speed of 50ms instead of your regular 700-900ms on WordPress.
4. Varnish
CloudFlare, as good as it sounds, has one serious flaw – each of its edge servers needs to obtain a current version of our page separately. So, if you request the page twice from NYC, the second hit will be served from cache and will be super fast. But, if afterwards someone requests the same page from an area served by another edge server, the content will not be cached and therefore the request will be slow.
You can see why we keep Varnish on top of WordPress. The first request to any given page caches it on Varnish, meaning any other edge server requesting content gets its Varnish cached version – super fast.
The technical side of optimizing WordPress hosting
As opposed to a step-by-step tutorial, this section is rather a detailed description of what needs to be in place and why.
In order to get this set up to your site you will need:
- A Linux web server with root (or sudo) access
- Access to your domain control panel
- A fair understanding of your server setup
Personally, when working on hosts like DigitalOcean droplet, we would advise you to create a snapshot of the current server and then set up a duplicate droplet to experiment on. Having this means you can easily switch to the old machine if something goes wrong and your site becomes inaccessible.
Server setup
In our case, we have Varnish and Apache2 servers running on a single host, but there’s nothing preventing you from running these on separate machines or as swarms of servers.
We’re using Varnish 4, and if you’d like to use our config file you should go for this version as well. There any many instructions (eg. this for Debian-based systems) on how to install Varnish, so there’s no sense in repeating it here. Assuming you have Varnish 4 running on the host you’re using, read on.
On Ubuntu 14.04 (16.x has a slightly different setup), there are two files that should be interesting for you:
- /etc/default/varnish – here you can set the port on which Varnish is listening for connections, as well as change the type of storage it’s using. We need to change the port to 80 and for small sites like ours, we go with memory storage. Here’s our version of the file:
https://gist.github.com/nowakpiotrek/04f2b8088b647c29e2dc56adb84790f6 - /etc/varnish/default.vcl – this file defines how Varnish should handle requests, what to cache and what to let through untouched. We keep our version of this file with the site source code and symlink it to that location. You could also change its location in the default file. Here’s how this file looks for us:
https://gist.github.com/nowakpiotrek/8ddb1e2f87ee2dcc906156f7afbe7e95
Important note: our VCL file is meant to work for a specific case when caching everything for long periods of time is a wanted outcome. You should consider this before using this configuration for your website. If you have any content that is dynamically generated, the outcome may be unexpected.
Our WordPress VCL is an adaptation of some commonly-available Varnish 4 VCL file for WordPress, but with additions that support our optimized WordPress hosting setup.
First of all, we modified part of the file responsible for purging the cache:
# Allow purging from ACL
if (req.method == "PURGE") {
  # If not allowed then an error 405 is returned
  if (!client.ip ~ purge) {
    return(synth(405, "This IP is not allowed to send PURGE requests."));
  }
  if (req.http.X-Purge-Method) {
    # Allow banning of URL sets using regex
    if (req.http.X-Purge-Method ~ "(?i)regex") {
      ban("req.url ~ " + req.url);
    } else {
      return (purge);
    }
  } else {
    # If allowed, do a cache_lookup -> vlc_hit() or vlc_miss()
    return (purge);
  }
}
Usually, Varnish configuration clears the cache for a single URL when it’s accessed with http method PURGE. For example, we could clear the home page of our blog by running it on the web server:
# curl -I PURGE -H “Host: www.nopio.com” ‘http://127.0.0.1/blog/’
This is enough to enable WordPress plugin “Varnish HTTP Purge” functionality, but it’s not enough for us. We need to be able to clear the cache for a set of URLs using regex matching. In order to achieve that, we added a check for a special header that changes the default setting. Using our changed VCL, you can clear a whole cache for a blog site by running:
# curl -I PURGE -H “Host: www.nopio.com” -H “X-Purge-Method: regex” ‘http://127.0.0.1/blog/.*’
Secondly, the response for the OPTIONS method is important, which is used to enable CORS. We use it like this:
set resp.http.Access-Control-Allow-Origin = "*";
set resp.http.Access-Control-Allow-Credentials = "true";
if (req.method == "OPTIONS") {
	set resp.http.Access-Control-Max-Age = "1728000";
	set resp.http.Access-Control-Allow-Methods = "GET, POST, PUT, DELETE, PATCH, OPTIONS";
	set resp.http.Access-Control-Allow-Headers = "Authorization,Content-Type,Accept,Origin,User-Agent,DNT,Cache-Control,X-Mx-ReqToken,Keep-Alive,X-Requested-With,If-Modified-Since";

	set resp.http.Content-Length = "0";
	set resp.http.Content-Type = "text/plain charset=UTF-8";
	set resp.status = 204;
}
Finally, we set a long TTL on the cache, basically treating it as a permanent measure until manually cleared.
# For static content set Expire headers
if (bereq.url ~ ".(css|js|png|gif|jp(e?)g)|swf|ico|mp4|webm|ttf|woff|woff2") {
	set beresp.ttl = 365d;
	set beresp.http.Expires = "" + (now + beresp.ttl);
	set beresp.http.age = "0";
	unset beresp.http.cookie;
}
And defaults:
# A TTL (cache length) to 1 month.
set beresp.ttl = 30d;
# Define the default grace period to serve cached content
set beresp.grace
Special note: it’s not always obvious how to debug issues in the VCL file. This is done by adding log lines into it. Add it in just after the line describing the version of the file:
import std;
Add lines like this anywhere you need a log entry created:
std.syslog(180, “NOPIO: Starting PURGE”);
Now you should be able to see the output in the system log. We’re namespacing the log to NOPIO for easy grepping:
# tail -f /var/log/syslog | grep NOPIO
Besides Apache and Varnish, you want to make sure you have a PHP OPCache module enabled in Apache. It’s not mandatory but it will speed up things somewhat by caching already used PHP objects. Its default settings should be OK to start with.
CloudFlare setup
This can be a relatively dangerous procedure. You need to switch your domain DNS so it’s managed by CloudFlare. Although easy, it’s worth reviewing any changes a few times before proceeding, as you may break your website or email-receiving capabilities due to misconfigured DNS. As a general rule, just follow the steps described in the set-up wizard and double check everything – the process is mostly automated, but you want to be sure.
Having the DNS control moved to CloudFlare, you can now enable a cache for your domain. Our website is running on the www.nopio.com subdomain. We have this subdomain configured as an A record, pointing directly to our web server IP. Besides that, CloudFlare creates an additional subdomain “direct.” that allows accessing the site while bypassing the cache.
After you’re done with the setup, you should see something like this (with a lot more records besides these and IP addresses after the “points to”):

The orange cloud means your domain is being cached.
Next, you need to create some page rules. First of all, by default, CloudFlare only caches static content and you’d like it to cache pages as well. We also need to make sure admin is not cached and that the preview of the posts works. Our set of rules looks like this:
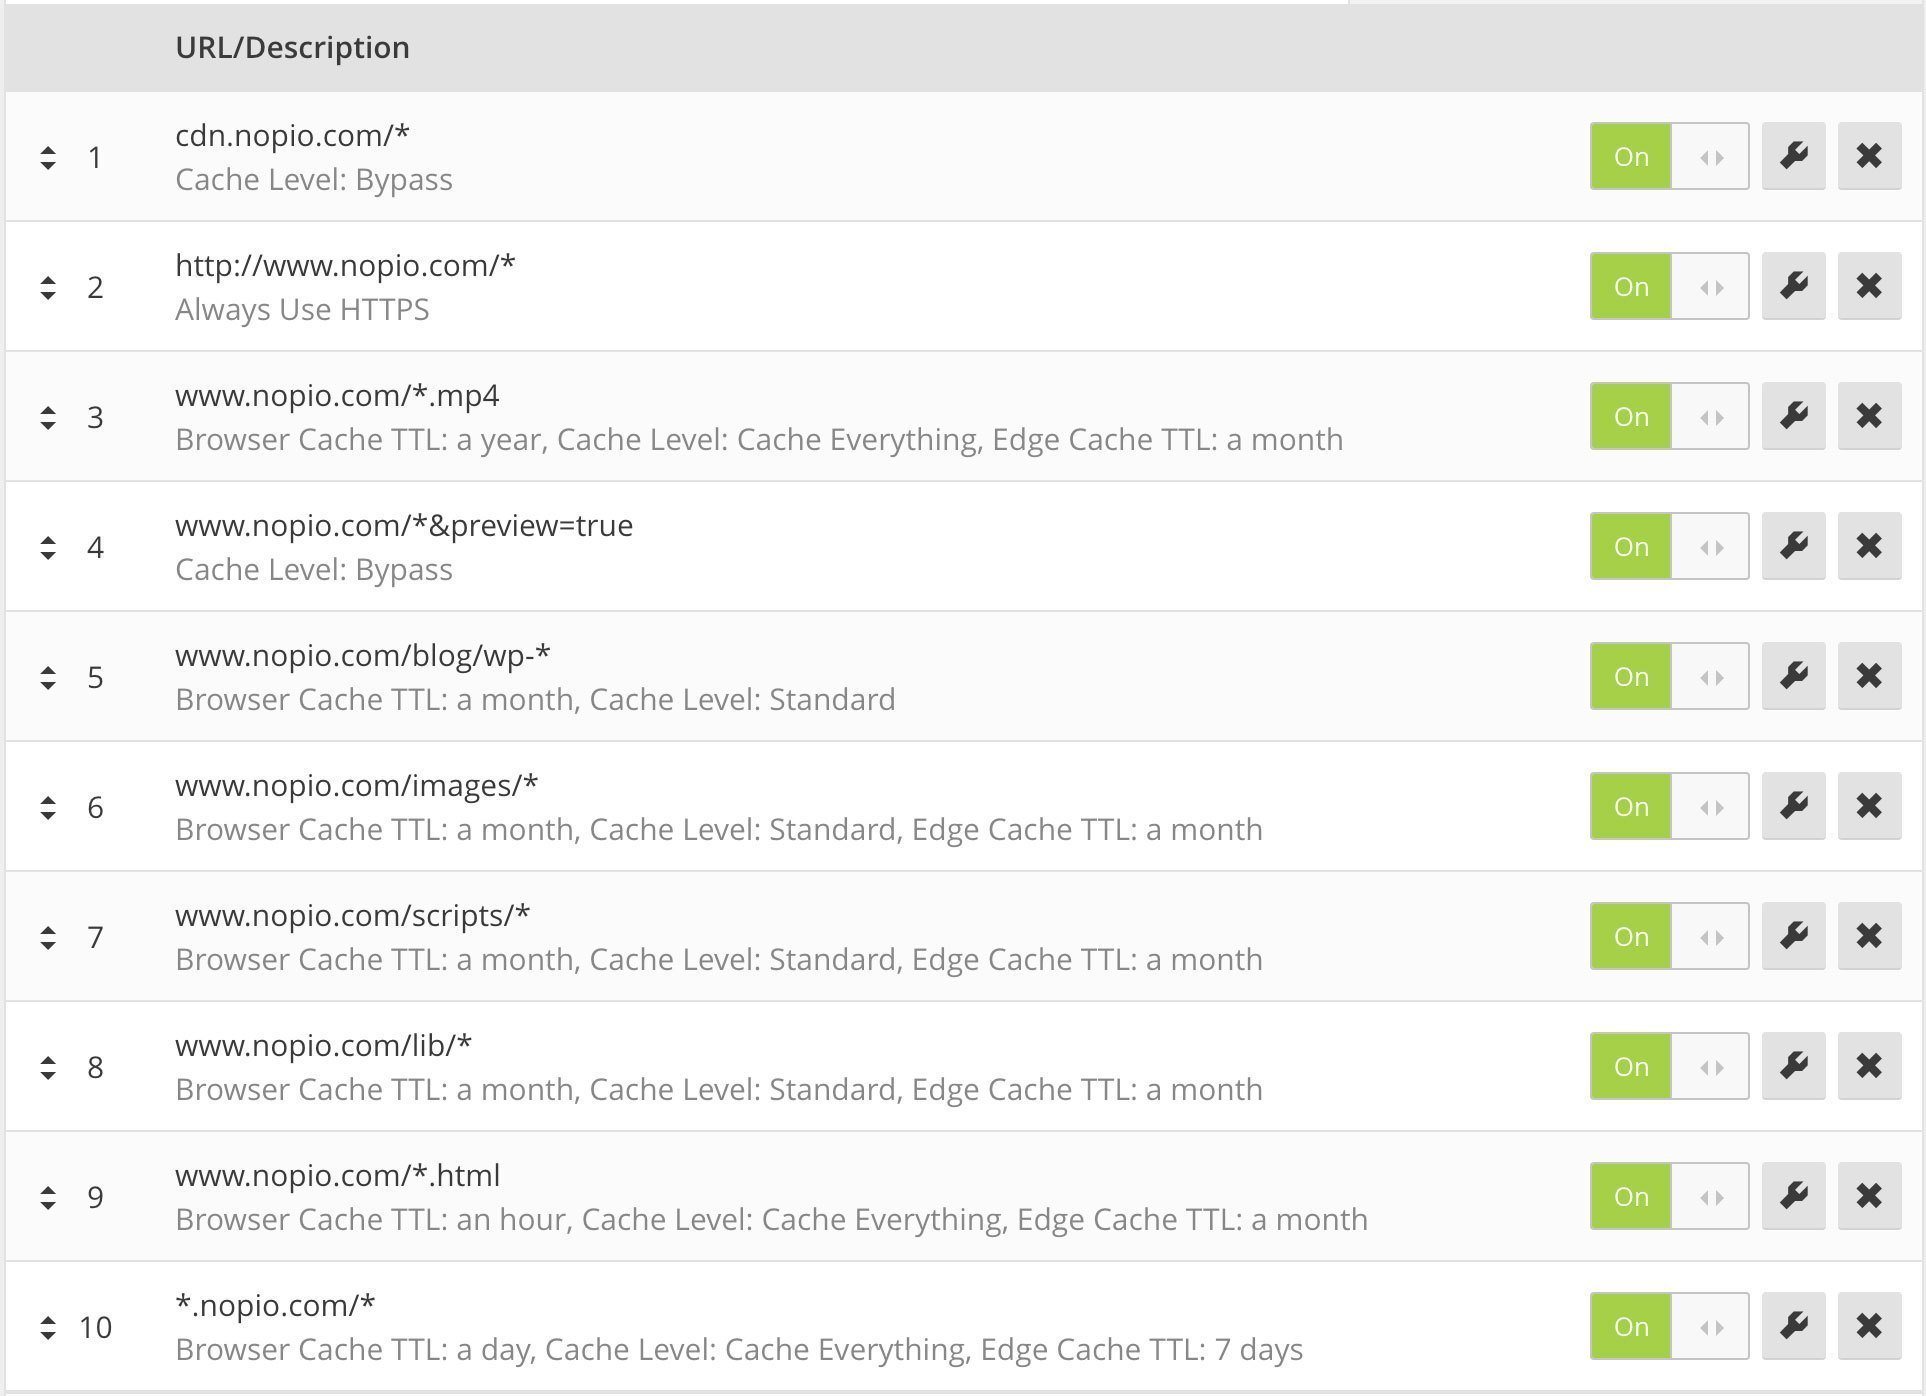
It should be possible to simplify it somewhat, but since so far only the /blog/ part of our website is running on WordPress, we need a few more rules.
CDN setup
As we hoped for a cookie-less domain for our static assets, we created a new subdomain cdn.nopio.com that points to the Amazon CloudFront distribution and added
define(‘COOKIE_DOMAIN’, ‘www.nopio.com’);
to our wp-config file. Unfortunately, CloudFlare adds a cookie on .nopio.com and YSlow will not register traffic to cdn.nopio.com as fully cookie-less 🙁 Here’s the explanation:
https://www.quora.com/How-can-I-serve-cookieless-domains-with-Cloudflare
When creating the distribution, you need to remember to point it not to your main domain (www.nopio.com in our case), but to the one that bypasses the cache (direct. subdomain), otherwise you’ll get a double cache on the resources and clearing a cache will become a whack-a-mole game. This advice comes from experience!
Important settings:
- Alternate Domain Names (CNAME). We use cdn.nopio.com
- Either allow HTTPS or don’t, but if you want to use it you’ll need to have a custom SSL certificate for your custom CNAME.
- Forward headers. Pick Whitelist and enable “Origin”. You need to enable CORS for the CNAME so the Access-Control-Allow-Origin header will be passed from Varnish.
- Change the default setting of “Query String Forwarding and Caching” from “None” to “Forward all, cache based on whitelist” and add “iv” to whitelist input. This is very important since the value of this parameter is managed by the CometCache plugin and is increased with every cache clear. Without this you’d need to invalidate the files in the distribution after every change which can take from a few minutes to an hour. This way it happens instantly since you just start using a new URL.
CornetCache Pro plugin settings
It’s time to bind these bits and pieces together in the plugin configuration. Here’s what options we’re using and why:
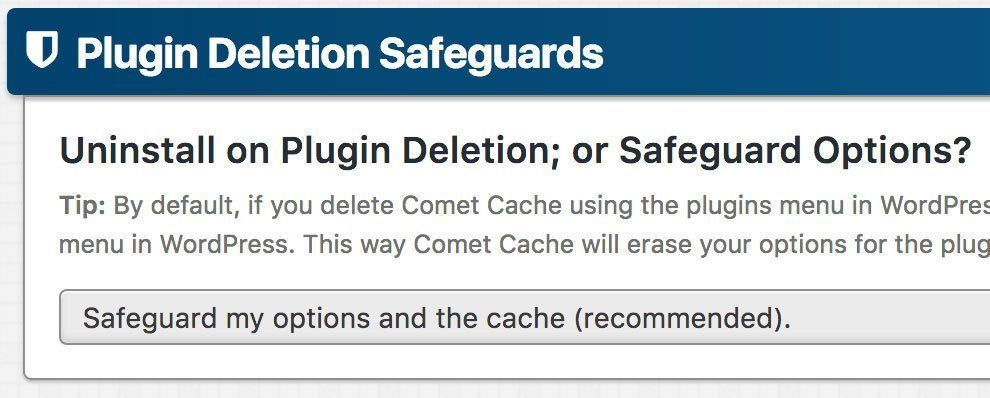
1. Enable plugin deletion safeguards. If you ever delete your plugin by mistake, the options will be kept in the DB and will be enough to just re-upload and enable the plugin again:
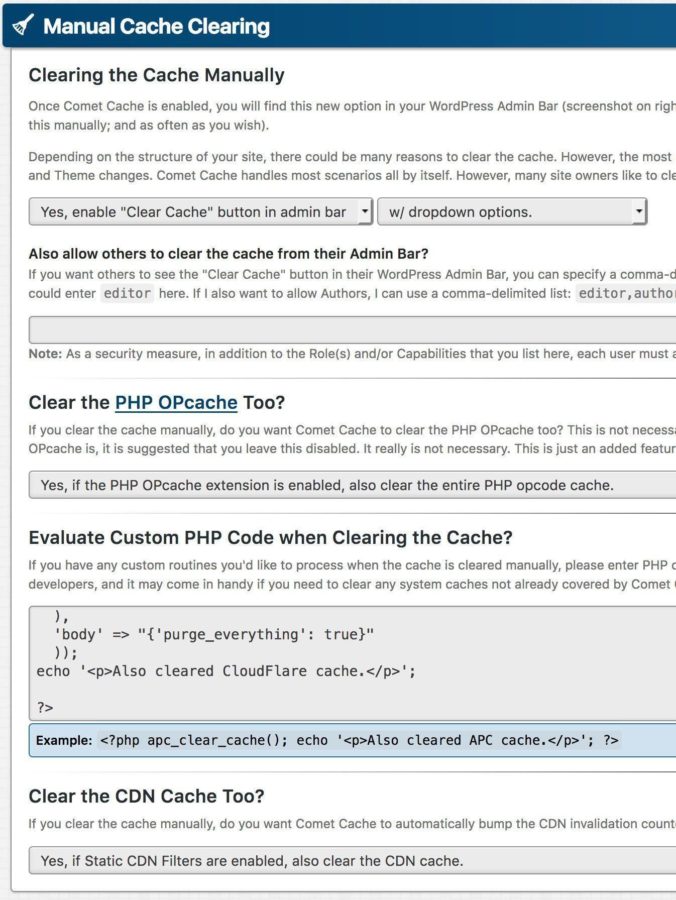
2. Manual cache clearing. You want to enable this then ask it to clear OPCache. Enable clearing of Varnish and CloudFlare caches by adding a snippet of code to the “Evaluate Custom PHP Code when Clearing the Cache” section:
https://gist.github.com/nowakpiotrek/1862e87161a66599a167544a1886b283
In order to use it you should define the constants used in the snippet in your wp-config.php file:
VHP_VARNISH_IP – is used to store Varnish IP. It’s also used by Varnish HTTP Purge plugin to work properly
CF_ZONE – CloudFlare identifier of your domain. You can obtain it from the API itself.
CF_EMAIL – Email address used to access CloudFlare.
CF_KEY – API Key provided in the account section of the CloudFlare service.
The final setting in this section asks the plugin to also clear a cache of the Static CDN Filters. Simply switch “Clear the CDN Cache Too?” to “Yes, If Static CDN Filters are enabled, also clear the CDN cache”.
3. Automatic cache clearing. Yes, you want that.
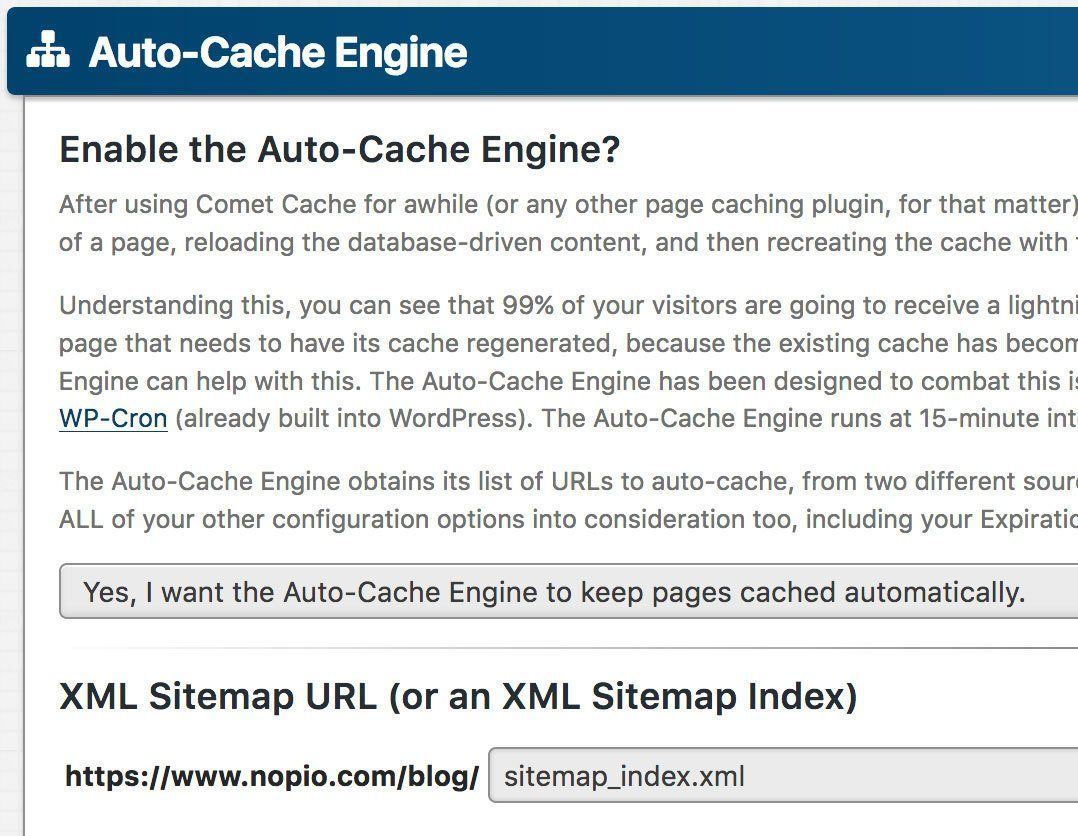
4. Auto-cache engine. Yes, you want to have it enabled to keep the cache warm. This requires a sitemap to be generated. We do it via Yoast SEO plugin.
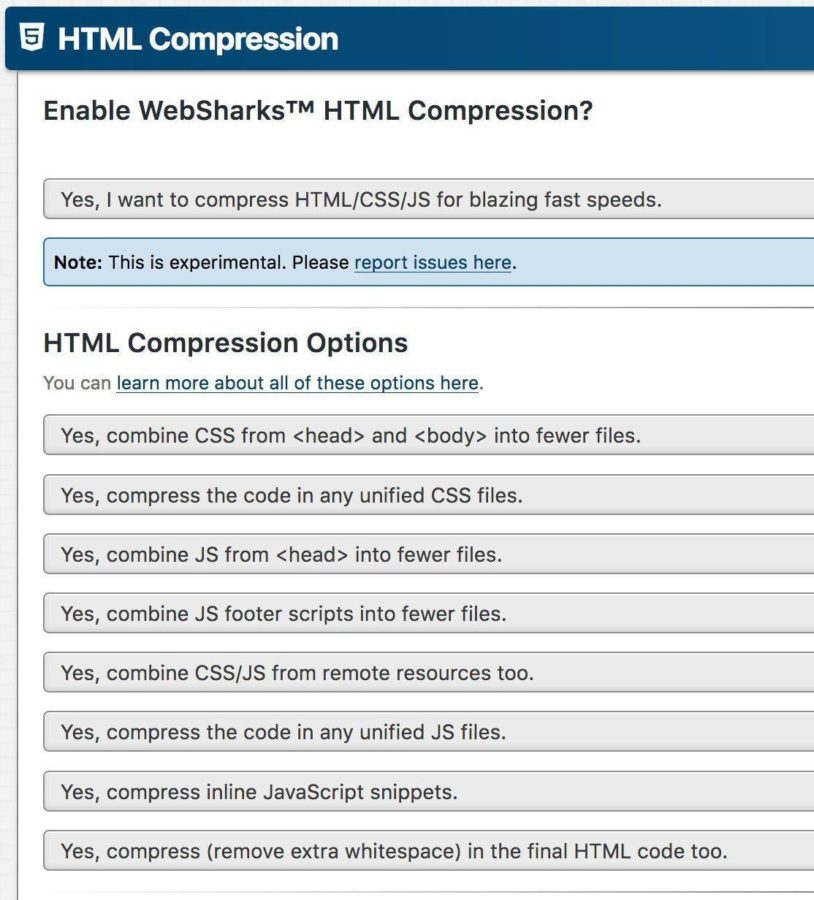
5. HTML compression. You want to mark everything here as YES, but you need to test your site with these settings enabled. Some sites have messy CSS/JS and afterwards, this operation may not work properly. Also, if you’re using Contact Form 7 plugin, you need to add
define(‘WPCF7_VERIFY_NONCE’, false);
to your wp-config.php file, otherwise any page containing the form will not get cached.
6. Static CDN filters. If you have gone through all the trouble of setting up the CDN, here’s where you finally put it to use. Simply set it to YES and enter your cdn domain (cdn.nopio.com in our case) into the “CDN Host Name (Required)” input field.
Make sure to check HTTPS support if you need one:

7. Apache optimizations. You should enable gzip compression and modify the .htaccess file accordingly.
Validating your setup
You can use gtmetrix.com, or a similar service, in order to see how well your website performs. In general, if set up correctly, you can expect a significant boost in the scores and page speed.
Content management workflow
Having all the configs in place, tested and validated you should be able to work on the site’s content as previously. The only additional step is clicking on the cache-clearing option in the top bar after finishing the content edit and publication cycle:

Conclusion
It’s essential to optimize WordPress for speed. This tutorial seems lengthy, but the whole process does not take that much time when you already know what you’re doing. It’s so worth the effort – happier readers mean more returning traffic – and that’s what we all want. 🙂
