As you've probably guessed by the title of my article, I still consider Ruby on Rails as a relevant technology that offers a lot of value, especially when combined with ReactJS as it's frontend counterpart. Here's how I approach the topic.
In previous tutorials, I’ve shown you how to connect Rails with ReactJs, which creates a simple application that allows us to add, edit, delete, or sort events. You can read these tutorials by clicking the links below:
https://www.nopio.com/blog/react-rails-part-1-tutorial/
https://www.nopio.com/blog/react-on-rails-tutorial-part-2/
In this tutorial, we will create the same application using AngularJS and Ruby on Rails. It would be good to compare these two JavaScript frameworks by making the same application using each one.
What is AngularJS?
AngularJS is an open-source front-end application framework maintained by Google, and was initially released in 2010. It uses MVC and MVVM architecture patterns, and helps to build big and scalable applications.
Let’s prepare
In this tutorial, we will be using Rails 5.0, so be sure that you have the latest version of Rails installed.
$ rails -v
Rails 5.0.0.1
If your output is different, run the following:
$ gem install rails
This command should download the latest version of Rails from rubygems.org.
Create a new project:
$ rails new angular_example
Remove gems and add some in Gemfile:
Bower and assets
To manage our assets, we will be using Bower, which is a great managing tool. First, create a Bowerfile (near the Gemfile) inside the application and be sure that you have installed node.JS and Bower on your computer. If not, follow these commands:
$ brew install node
$ npm install -g bower
We want to download angular and bootstrap for now. To the Bowerfile, add:
asset 'angular'
asset 'bootstrap'
If you’re done with editing Bowerfile, run:
$ bundle install
$ rake bower:install
By running this command, Bower will download all needed assets and dependencies to the vendor/assets/bower_components directory.
Now, we need to include them. To do so, edit the application.js file and override it with:
//= require angular
//= require_tree .
Then the application.css and add some missing styles:
Remember to remove turbolinks from the application.html.erb file:
While you’re using a front-end framework, using Turbolinks can sometimes cause problems.
Angular setup
Now that we’re done with basic setup, let’s check if bootstrap and angular works.
Add the dashboard controller:
$ rails g controller dashboard index --skip-assets
Edit the routes.rb:
When you hit the http://localhost:3000/, you will see that bootstrap has loaded. Now, let’s check angular.
Edit the layouts/application.html.erb body tag:
By adding the ng-app, we tell the application to initialize angular. However, we also need to initialize the application in the javascript file.
Add a new file called app.js in the app/assets/javascripts/angular:
Now refresh the page. You should see an output from our 2+2 equation, which is 4. If you see this, it means that we can now start coding some real material!
Let’s start
We’ll start by adding the frontend – angularJS and HTML. Later, when everything successfully works, we’ll add the backend which will “talk” with our database.
Let’s add HTML code to the dashboard/index.html.
You can remove {{2+2}} from the application.html.erb.
As you see, the ng-controller directive is added, which points, that in these code, we will refer to the EventsController (EventsCtrl). Let’s add the new file under the app/assets/javascripts/angular/events/EventsCtrl.js.
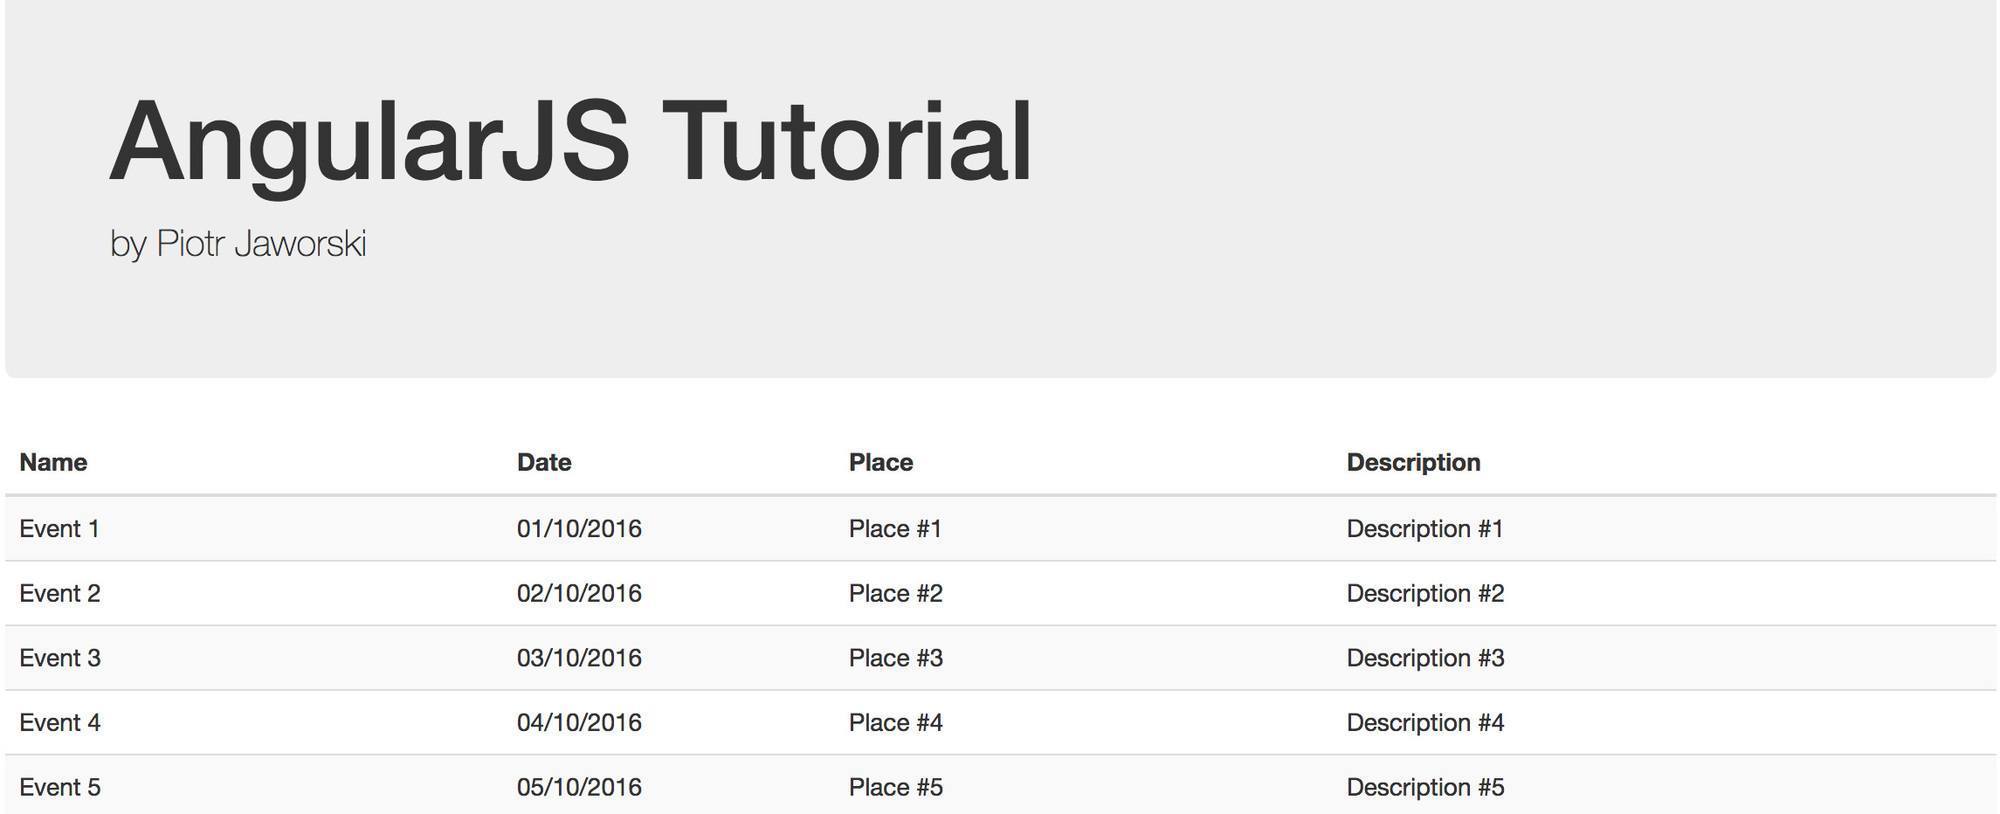
If you hit refresh, your page should look like this:

Now, let’s add code from our new controller:
Now we’ve initialized the controller and assigned the events variable an array with events. It’s time to use $scope, which is an object that refers to the application model. It allows us to share our variables/functions between views and functions. You can read more about what $scope can do here.
Let’s begin by adding some HTML code which will allow us to render the table with events:
Use the ng-repeat directive:
ng-repeat=”event in events”
It will iterate through all events stored inside in the $scope and render requested part of HTML.
The result should look like this:

Search for events
Imagine trying to search through 2000 records. It would be hard to find anything you were looking for without any filters.
Let’s add a front-end handled search form:
We’ve added just the input and marked it as ng-model=”search”. This means that any text in the input is recognized as “$scope.search”. To filter through events with the search phrase, we simply need to modify our ng-repeat directive:
ng-repeat="event in events | filter : search"
It will filter through all records that include a search phrase.
Easy, right?
Add new event
Let’s add the next feature which will allow us to add a new event!
Add the form in the index.html.erb:
By submitting this form, we call addEvent() function which adds an event to the $scope.events variable. One important thing to note is that by adding event.name into the ng-model attribute, we can read the inputs value in the controller by calling $scope.event.name. Ng-model stores everything in the $scope.
Add some styles to the applications.css:
Let’s add the addEvent() and valid() functions to the EventsCtrl:
addEvent() function calls the valid() function which checks if all inputs have been filled, if not – it simply returns false.
If everything is successful, we push to the $scope.events objects a new event object and clear all input values. And we’re finished!
Add the backend code
We’re done with frontend part for now, as we’re able to search for events and add a new one. But when you refresh a page, everything will disappear. This is because we add events to a javascript array and not to the database.
Let’s add the backend now. First , let’s add ngResource.
To the Bowerfile add:
asset 'angular'
asset 'angular-resource'
asset 'bootstrap'
And run:
$ rake bower:install
And add to the application.js file:
//= require angular
//= require angular-resource
//= require_tree .
Edit the app.js:
var app = angular.module('angularExample', ['ngResource']);We’ve just added ngResource to the our application.
Add our event resource:
$ rails g resource event name event_date:date description:text place --skip-assets
$ rake db:migrate
Edit routes and move it to the namespace:
Move the controller under the api namespace (create new folder). Remember to move class EventsController inside the Api module.
Add to the Gemfile:
gem ‘responders’
Bundle everything and install the gem:
$ bundle install
$ rails g responders:install
Add seeds (seeds.rb):
To fill out the database with seeds, run:
$ rake db:seed
We’ve added the responders, but we’re not using it yet. The gems are able to respond from any action in specified formats. For example: json, xml, js. If you hit the index action as HTML, the whole code in the method will be executed, and at the end, a html file will be rendered.
In our application, in the events resource, we need to use the the JSON format. Let’s add it:
While we generated the event model in the Rails app, we also need to add the event model in Angular.
Create the event.js inside the event directory:
Angular’s factory is similar to the Rails model. It’s the directive which defines a “class” with all methods, which we can use later in controllers.
When you hit the http://localhost:3000/api/events.json, you’ll notice that a JSON is rendered. Finally, we can change our events source in the $scope.events variable.
By calling the query() method, we send a request to events.json, and as result we get an array. Also, the get() method returns all records, but as an object and not an array.
Now let’s get records from the database. Let’s also add them to the database too, not only to a javascript array.
Modify EventsController.rb:
In the create method, we create a new object from event_params. If everything goes successfully, the response will render a JSON with the new object. If not, we’ll send an alert via browser.
Edit routes and add the create method:
Finally, let’s modify our addEvent method to the EventsCtrl.js:
We call .save() method, passing a new event. The first function block executes if the request ends successfully, while the second block executes if the request was wrong.
You may notice that we can’t create a new record yet, even if the params are correct. Our console reports an error:
ActionController::InvalidAuthenticityToken (ActionController::InvalidAuthenticityToken)
This means that we don’t pass our request to the csrf token. To fix that, let’s add the ‘angular_rails_csrf’ gem. This gem adds the csrf token to our request without any complication.
Add to the Gemfile:
gem 'angular_rails_csrf'
And run:
$ bundle install
Search for events
Great job, we’re done with filtering on the frontend. Let’s add some code and make a direct query in our database to find records that match our criteria.
First, add the search form, in fact an input:
Remove filter from the table body:
<tr ng-repeat="event in events">
          <td>{{event.name}}</td>
          <td>{{event.event_date}}</td>
          <td>{{event.place}}</td>
          <td>{{event.description}}</td>
        </tr>
While you type inside the input, it calls the filterEvents() method.
Let’s add this method:
This method calls the search method with the query param, which is in the Event factory, and if everything goes successfully it assigns returned records to the $scope.records variable.
Add a custom route to the Event (event.js) factory:
Update routes:
Now we need to add the last code, which will make this feature fully working – the backend code. Add the search method:
It makes a SQL query and searches the database for records with our criteria.
Inline edit
In our React tutorial, we learned about inline editing. Let’s add it now.
Change the table content (tbody) to the:
We changed the tbody content to just one line because the ng-include directive renders a code which is inside in the requested partial. For example, inside:
<script type="text/ng-template" id="form">
…
</script>
We pass the the ng-include directive a function (toggleForm()) to change the content dynamically, based on the $scope params.
Let’s add two partials at the bottom of the index.html.erb. One will render content with table content, and the second one inputs, which will allow us to edit an event:
And edit thread:
      <thead>
        <tr>
          <th class="col-md-2">Name</th>
          <th class="col-md-2">Date</th>
          <th class="col-md-3">Place</th>
          <th class="col-md-3">Description</th>
          <th class="col-md-2">Actions</th>
        </tr>
      </thead>
We added three methods: hideForm(), updateEvent($index) and editEvent(event).
The editEvent(event) method renders the inputs, changing the $scope.editing object to the requested event.
The hideForm() hides the inputs and displays a normal table row with event fields. It assigns to the $scope.editing object an empty object.
The updateEvent($index) updates an event, sends a request to the back end, andclears the $scope.editing object.
Now let’s these functions to the EventsCtrl:
Let’s also add the update method to the Event factory. By default, angular doesn’t have this route:
Add the update method to the EventsController.rb:
And update our routes:
By clicking the Edit button, you should be able to see the inputs:

Destroy event
What if you added an event by mistake? In this section, we’ll focus on a new feature – deleting an event.
Let’s start with the frontend code, add the destroyEvent() method in the EventsCtrl:
We send a DELETE request to the backend, and if everything goes successfully, we’ll remove the requested event from a javascript array calling the splice() method.
Let’s add the button which will allow us to call this function:
Add the new route in the Event factory (basically, we override the delete method, which is already added by default):
Add the destroy method to the EventsController.rb:
And remember about the Rails routes:
Sorting
In this section, we’ll add the last feature – event sorting.
First, add some styles in the application.css
Let’s change the thread content:
We’ve added the sortEvents() method. It sorts events by the order and field name.
We also added the ng-class directive to specify if we should underline a th tag – when it’s active.
The last new term is the ng-if directive. When code inside the directive returns true, the HTML block will be rendered. So if an active sort field name equals to the compared th block, we render an arrow to show the active sort order.
Let’s add the sortEvents() method to the EventsCtrl.js:
The sortEvents() method sorts our events and sets the active order and field name in the $scope.sorting object.
We should also add one more method – the updateArrowOrder() method. It translates a sort order into an HTML class to render our arrow.
The $scope.$watch() method listens for any changes in the $scope.sorting.order variable If it changes, it causes the updateArrowOrder() to change the direction of the arrow in the table.
Let’s add the new route to the event factory (Event.js):
And finally, let’s change the index method in the EventsController.rb:
We sort all events based on the order and field name params. Remember the SQL injections and sort and order by permitted fields.
We can’t call the query like the following:
Event.order(“#{params[:sort_by]}” “#{params[:order]}”)
What will happen when someone will add in the params a code, which will perform something different than the order method? For this answer and more about SQL injections, you can read here.
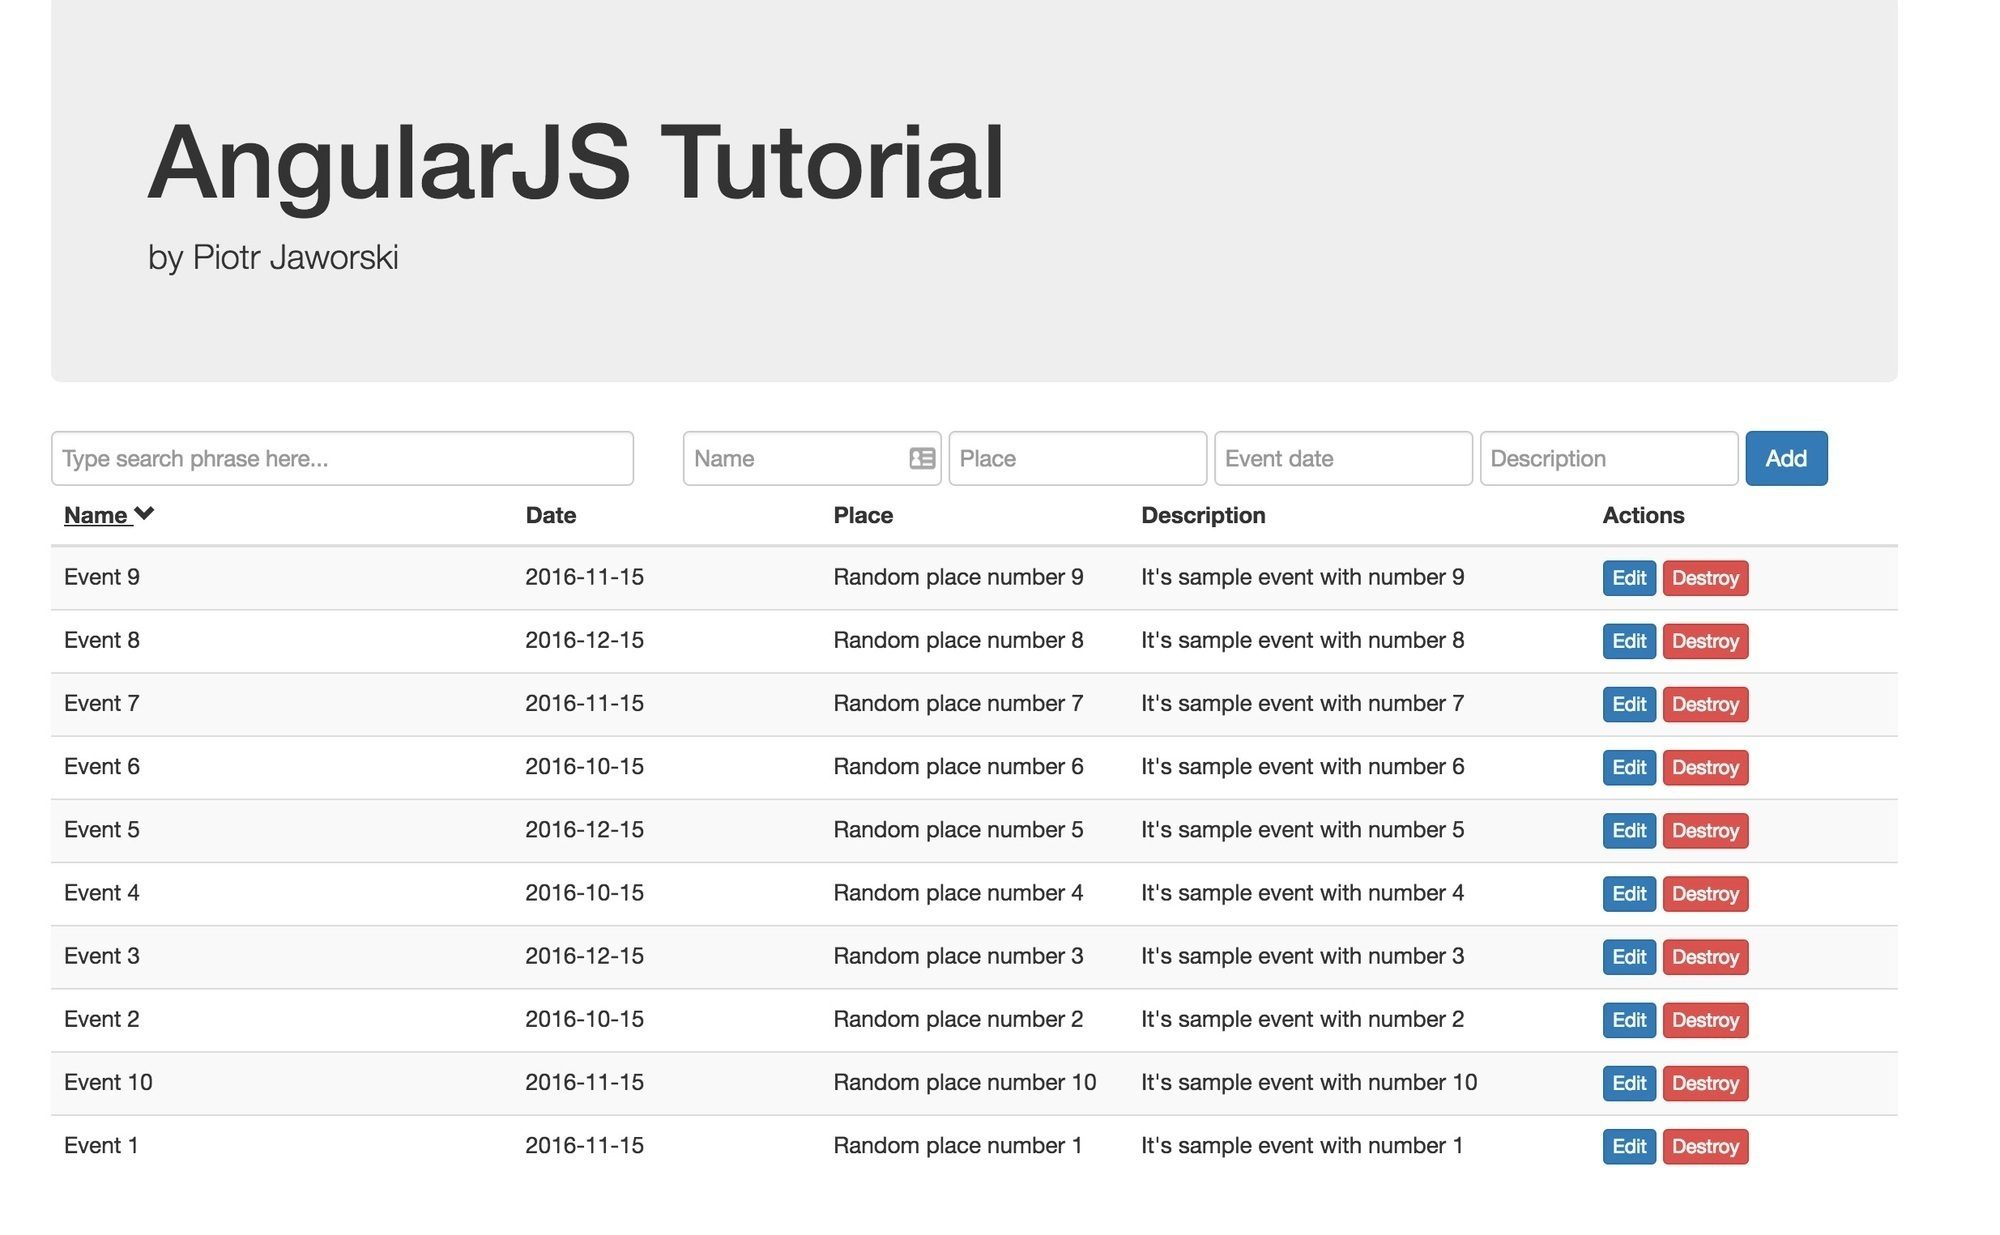
The whole application should look like this:

React or Angular?
It’s tough to decide which is better to use, React or Angular.
Angular offers MVC pattern and is more mature than ReactJS. However, Angular also has a few disadvantages. Earlier this year, Google delivered a new version of Angular – Angular 2. It’s a completely different framework than Angular 1.X and it means that from now on, all models and directives from 1.X in Angular 2 will be considered out of date.
Compared to Angular, React is easier to use and is more readable. Moreover, with React Native, you can also build mobile apps which is a great thing! Angular reminds me old HTML attributes style, using ng-directives directly in code. I would personally choose ReactJS over Angular.
Conclusion
In this tutorial, we created fully working event applications which allows us to add,delete, edit,search for, and filter through events. You can compare how the same features look in React by reading our two different articles which can be find here:
So which one will you choose? React or Angular?
If you got lost or you want to check the code of this post, the whole application code is here, on GitHub. We hope you enjoyed our tutorial!


